As you approach the middle of beginner year, most students should be able to read, find, and play each note on a piece of music successfully as described in Part 1. Just like a child learning to read sounds out each letter in a word, then puts those letters together to form a word, at this point your beginners are reading each note in a musical phrase and then putting those notes together to play the phrase. Now we want our students to move away from learning music one note at a time. We want them to be able to see the notes in groups or in a shape, a little “musical word.” We want to train their brains to see the keyboard and the music in pictures, in shapes, rather than as a flood of black notes on the page or keys on the keyboard.

Basic Music Theory
Students need to have a solid grasp of basic music theory concepts. If your beginner mallet book has a lot of music theory pencil work, make sure your students are filling it out successfully. Do not skip over or rush through keyboard theory!
Beginner students need to have a solid grasp of:
- how to build a scale on the keyboard using whole steps and half steps
- how key signatures work
- how to transpose short musical phrases between keys
One Octave Scales, Thirds, and Arpeggios
Scales are one of the quickest ways for students to organize all the notes on the keyboard into little snapshots in their minds. Introduce scales as soon as students can play piston strokes with correct technique.
A quick side note: for students who had experience with Orff instruments in elementary school, it is helpful to build a connection between Orff instruments and keyboard instruments. When students used Orff instruments, the teacher would have them add or remove specific bars so that the only notes available to hit were those in the correct key. Now, in beginner percussion, we do not remove any keys, but we do memorize which notes on the keyboard are okay to play on a given piece of music–we do this through memorizing scales and key signatures.
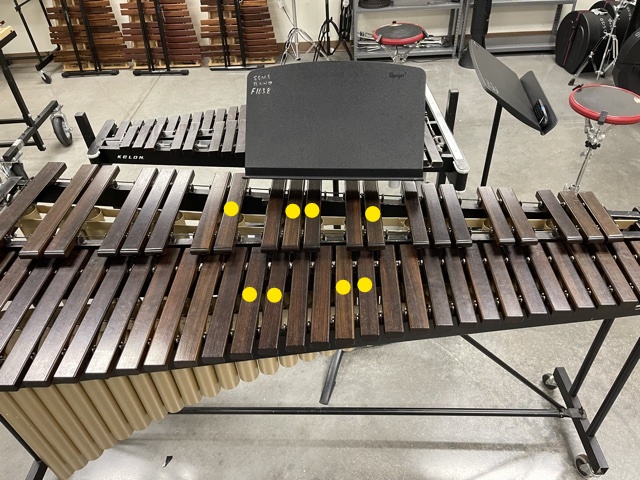
When given a piece of music in a specific key, we want each student to mentally see which notes are available to play, and to be able to feel the shape of that key in their hands. For example, if the key is Eb, students should need no time to think about which notes receive a flat and where those notes are on the keyboard. It should be second-nature, automatic, and not something that takes up any time in the sightreading process.
Once students can successfully play the C, F, and Bb one octave scales, it is time to add on thirds and arpeggios. To do this, have students start the scale with the left mallet, and alternate every note of the scale. At the end of the scale, have them go straight into playing thirds off the left mallet going up, and the right mallet going down. After thirds, have them play the arpeggio going up and down the scale.
Start by teaching the C scale, thirds, and arpeggio by rote, and then have students try to figure it out for the F scale next. This is transposing!
By the end of the beginner year, students should be able to play one octave scales, thirds, and arpeggios in all 12 keys.
Apply Scales, Thirds, and Arpeggios to the Music
Once students are confident playing scales, thirds, and arpeggios, show them how to find scales, thirds, and arpeggios in the music they are playing. Explain to students that most musical ideas move within the framework of scales, thirds, or arpeggios. Pick a piece of music and show them this, measure by measure, line by line.
When you introduce your intermediate students to a new etude, discuss what key each musical phrase is in, and how scales, thirds, and arpeggios are used in that phrase. Do they see any arpeggios in the piece? Do they see any scale patterns? Have this be a regular practice when handing them a new page of music.
Transposing Scale Patterns
In the technique exercise section of most beginner books there is a page with little scale pattern exercises, most likely in the key of C. Have the students learn to read and play each line. Then see if they can figure out how to play the same pattern in the key of F, adding a flat. From there, have them transpose each line into all 12 scales. This would be easy to implement in pass-offs for 6-8th graders, and really helps them organize the notes on the keyboard into snap-shot pictures by key.
Change What They See
Now, instead of looking at a new piece of music and spoon feeding themselves one note at a time, students can look at measure one, the first beat, and see four notes moving in a scale pattern from F to Bb in the key of F. Can they play that? Easy! They’ve played that hundreds of times in scale pattern practice. Oh look! Measure 2 has a Bb arpeggio, I can play that! In this way your students have a confident inner dialogue rather than a confused one.
Students with a confident grasp of basic music theory will be confident music readers. By introducing basic theory concepts, scales, thirds, and arpeggios, and how to transpose short phrases, your students can be comfortable rather than overwhelmed when looking at a new piece of music. They will not need to spend hours trying to memorize one note at a time, but instead will be able to read music just like they read words. This will result in happy, well-rounded percussionists who can feel just as confident on keyboards as they do on the practice pad!
For more beginner keyboard percussion tips, check out Part 1 of this article.
A former teacher, Charlotte Breedlove was a middle school band director in Plano, TX and also taught privately in the area. She received a Bachelor of Music Degree from Southern Methodist University where she studied with Drew Lang, Jon Lee, and Doug Howard.


Leave a Reply
You must be logged in to post a comment.