Do you have a game plan for teaching rhythm to your beginning band students? We have found that having specific, daily rhythm drills have resulted in students who sight-read well and play with confidence. Following are some suggestions on how to set up your own rhythm plan for your beginning band program.

Rhythm grids (printABLE and digital)
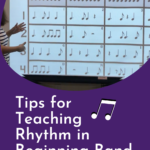
Have you ever noticed that students can quickly memorize counting exercises in a method book? Ever noticed that some kids “hide” behind that memorization and never really fully understand how to count? Rhythm GRIDS are a great way to solve this problem since you are always able to mix things up. Students may count the rhythms from left to right, top to bottom or bottom to top. Mix things up so they never count by rote! Note that the grid (pictured below) has individual measure numbers and line numbers as well as clearly labeled Level/Side at the top. These designations should make it easy for you to identify specific starting places for students.
The gray lines on the top show the subdivision so students can better understand the base rhythm on the page. The rhythms all line up vertically with the subdivision lines and students can relate any note to the subdivision line to see where it falls rhythmically. An fun idea is to have one or more students count the subdivision line as other students are counting any other line to show how the rhythms fit into the subdivision. You can have students clap the subdivision as they count the rhythm or, you can have students clap the rhythm as they count the subdivision.
We recommend printing your rhythm grids and using them daily if you are teaching in person. We also recommend having a digital version so you can use them during a zoom class or with a projector for large classes. As you can see from the picture above, we have our grids organized by levels (1-5) based on the ability of our students. We recommend this so students get solid practice on simple rhythms before moving on. These grids are also really fun for playing games like “Don’t Break the Chain” or “Popcorn.”
Single rhythm slides
Single rhythm slides are perfect for introducing new rhythms to your students a little bit at a time in conjunction with learning new measures on the grid. We suggest making rhythm slides that are broken down into simple, 4 beat rhythms. By having only one measure on the screen, students can focus solely on the new rhythm. After students have learned a good number of slides (12 or more) have them count straight through them in order. Project the rhythm onto a white board (or print a card to post on the board) and have students write the rhythm syllables/foot taps above or below the measure. Another idea is to consider making your slides timed so you can practice with a metronome, freeing your up to move around the room and observe. This can be done fairly easily in PowerPoint. We also suggest having a “shuffled slides version” of single slides to mix things up!
double rhythm slides/flashcards
Double slides are great for practicing eight beats at a time instead of four. But, they are even more fun for practicing duets! Have students count only the top (odd) or only the bottom (even) measures. This is just one more way to mix up the order of rhythms and also gets them used to reading only top or only bottom because they will need that skill to count (and play) duets and trios. Duets are a great way to check for student understanding and rhythm counting independence. They are also an ideal way to practice beat subdivision and pulse! If you choose to make these, we also recommend printing them out on full sized sheets of paper so you can use them as large flash cards. Additionally, like the single slides, consider making them timed so that slides change automatically every 4 beats, with the metronome set at 60 (or whatever tempo you choose).
trio rhythm slides
The trio slides are fun for a challenge – instead of duets, have a class trio! Divide up your class into 3 parts for a fun rhythm game. Have a contest to see which part can make no mistakes! Here are some other alternate ideas for trios:
- Have group A count, group B clap and group C stomp.
- Have students count 3 times through, a different line each time so by the end they’ve counted all 3 lines on each slide.
- When you divide them, use fun ways – A – dog fans, B – cat fans, C – horse fans.
- Have 3 students count it as a trio independently.
- Have students play it as a chord – group A plays Bb, group B plays D, group C plays F
- For a super challenge, have students stomp line C, clap line B, count line A all at the same time. This builds skill in reading vertically (like a score).
ideas for SIMPLIFICATION:
- Add 4 beats of rest in between each measure to give students more time to look ahead.
- Most of the time, slower is easier. If students are struggling, especially on more difficult slides, slow the metronome to 60 or 65. (Tempos can be adjusted for cut time and 6/8 sections.) The exception to this is if you’re counting lots of long notes (half/whole notes) sometimes slower is actually tougher to keep the pulse. Experiment with your students.
- Counting in unison is the simplest option.
- Counting in large groups is simpler than independently. For example, on the double slides having one side of the room count the top measure, the other have count the bottom measure is simpler than numbering off A, B, A, B where the people on either side of student B are an A. The more ‘mixed up’ they are, the more independent they must be. This is a great thing! Just be aware it makes it tougher. Start with simple and progress when students can be successful.
IDEAS FOR MORE CHALLENGING:
- Playing rhythms is usually more challenging than counting them. Students can play on one note (such as concert F) or play each measure as a different note of a different scale (more challenging still). For example, measure 1 – Bb, measure 2 – C, measure 3 – D. Students go up 1 note in the scale at each barline, then turn around and come back down after the tonic.
- For a challenge, or to keep students engaged on easier cards, speed the metronome up to 90, then to 110 or even 120. (Tempos can be adjusted for cut time and 6/8 sections.)
- Have students clap the rhythm as they count. If they are tapping with their foot (highly recommended!) then clapping the rhythm while keeping the foot tapping the beat adds a challenge that pays off when they start playing the rhythms.
- Counting independently by themselves (down the row) is challenging.
- Counting independently in groups (where the people on either side are counting different rhythms) is challenging. The more different parts going on at once, the more difficult. (ex. usually trios are more challenging than duets.)
We hope this article gives you ideas for implementing a rhythm plan so you can slowly and methodically teach rhythm to your students. While these rhythm slides and grids can be made on your own time, we realize that as busy band directors, you may not have the time. For a ready- made set of Rhythm Grids and Slides (5 Levels total) CLICK HERE! Our hope is that your students will learn to love rhythm counting, which results in better musicianship and a love for their instrument.


Leave a Reply
You must be logged in to post a comment.