During this time of remote learning, in-person learning with distancing, and some combinations of both we have been challenged to continue to provide a meaningful musical education for all of our unique students. I’m sure, like me, you’ve found that student’s varying situations are impacting them in their education more than ever before. This makes it all the more important to reach each of our individual students where they are at as frequently as we can. There are tons of great tools out there that will help you individualize instruction for your band students, but today I want to offer you some ideas on a free, customizable, and easy to use one: Google Forms.
Google Forms at its very surface level is a data collection tool that connects to your Google account. In a matter of seconds, users can create basic survey-style forms that collect information such as name, email address, t-shirt size, etc. If you dive in a little deeper, however, you’ll find that you can use a Google Form as your entire lesson in and of itself if you set it up creatively!
The Basics
- Visit “forms.google.com” to get started with your very own form by choosing “Blank Form” or even going with a template that you like
- Add a title so that you can find the form later in your Google Drive
- If you are using this with students, I recommend ALWAYS making “Name” the first question – you don’t want forms turned in and have no way to identify who turned in which answers!
- At the bottom right of each question is a slider that will let you “require” the question – use this to your advantage!

- Use the toolbar on the right side of the screen to add new content to your form. From top to bottom, these buttons allow you to:

- Add a Question
- Import Questions (use questions from previously created forms)
- Add a Title/Description
- Add an Image
- Add a Video (from YouTube is easiest!)
- Add a Section
- When your form is ready to be filled out, you can share it with the purple “Send” button at the top right of the screen.

- I usually share forms via a link, like pictured, but you can also send via email (envelope icon) or even embed into your website ( < > icon)
-
- Share your link ANYWHERE! Remind, Google Classroom, an email, your website, etc.
- When you send your Form, you can opt to “Collect email addresses” which will require anyone filling it out to sign in to their Google account. If your students all have Google accounts, this will work beautifully, but it will become confusing if they do not. Parents do not all have Google accounts, so I do not recommend this setting if you will be sharing with parents specifically. Even with “Collect email addresses” checked, I still HIGHLY recommend that your first question always be “Name”!
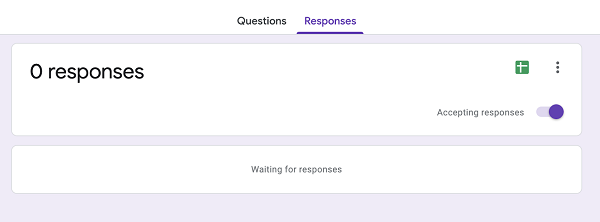
- Once you have sent the form out, you are ready to check for responses! At the top of your form click on the word “Responses” and it will take you to the responses page for that specific form. Here is where all of your responses will populate.
- Easily view responses in a spreadsheet format (Google Sheet) by clicking the green Sheet icon next to the three dots at the top right of this response window. This will create a spreadsheet that is LINKED to this form and will auto-populate new responses as they are collected!
- Turn responses on and off with the slider under the Sheet icon.
Creative Customizations for Individualized Instruction
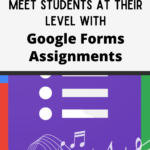
Once you have the basics down, you can let your creativity (and efficiency) take over! I have much less digital clutter hanging around in my Google Drive if I can make ONE Form for all 7 of my unique classes, even when they are all working on completely separate concepts and skills. I do this with an advanced setting called “Go to Section Based on Answer.”
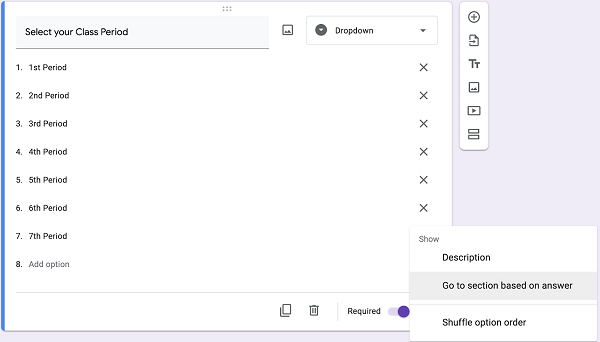
To get something similar to the image above, create a new question, and select answers based on the class periods that you teach (or ANY other identifier like instrument, part, etc.). Then, make a new section that has a matching title to each of these answer choices (1st-7th periods). At the bottom of the question, right next to the “Required” slider are 3 dots – click on them and you’ll see “Go to section based on answer.”

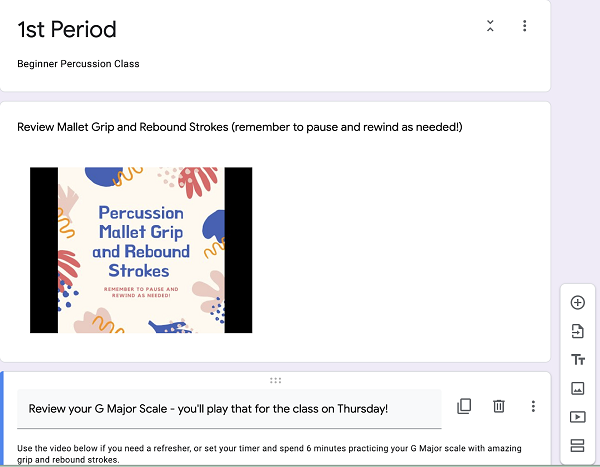
With the dropdown next to each answer, you can send students who select that answer to the section for their class period where they can access appropriate materials for that day’s lesson. The example here is the Beginner Percussion Class section where they will start the lesson by reviewing appropriate grip and strokes and then move along to a scale.
At the end of each classes section, make sure to choose to have them submit the form so that they don’t have to go through the assignments for your other classes. You can also send them to a “Closure” section that would be the same for each class if you choose to create one.

You can use the same technique of response destination to help students who select incorrect answers on other forms you create. Perhaps you are reviewing note reading on a staff and use an image of a note in your question. By selecting your response destination, you can have students who choose incorrect answers taken to a section that shows them a quick video review of the names of the lines and spaces before they try again and move on to the next question. The possibilities are endless!
If you’d like to see a video demonstration of some of these techniques, you can check out a general Google Forms Overview and how I use Google Forms for Listening Literacy Lessons with these links.
Marianne Condit White is a Middle School Band Director in San Antonio Texas and is a Google Certified Educator (Levels 1-2) and a Google For Education Certified Trainer. She loves to guide her students musically and prepare them to be good humans and to empower her peers and colleagues with ed tech assistance! Connect with her on her website, thatflippingbanddirector.com, or on social media – That Flipping Band Director

Related Reading:
Band Directors Will Flip Over Flipgrid!
Boom Cards: Digital, Interactive Task Cards for Band
Distance Learning Resources for Band
If you would like to receive our weekly newsletter, sign up here.
Don’t forget to like us on Facebook too!
Learn. Share. Inspire.
BandDirectorsTalkShop.com


Leave a Reply
You must be logged in to post a comment.