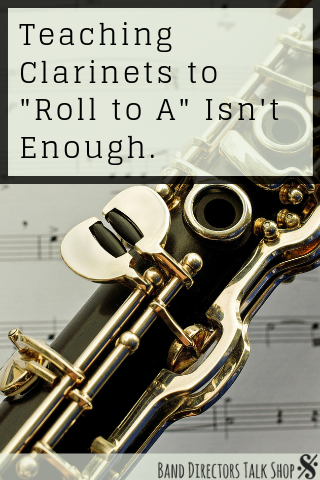
If you’re teaching clarinets to “Roll to A” that’s good – but it’s not enough. The left index finger is usually considered to be THE most important finger to affect clarinet technique, especially in advanced music.
Here are some other words and phrases to use as well as a great trick that lets kids visualize exactly where and how to place their finger. At the end I have a simple exercise to use when teaching clarinet, but the magic is not in the exercise. It’s in the words you use and the insistence on doing it right from day one.
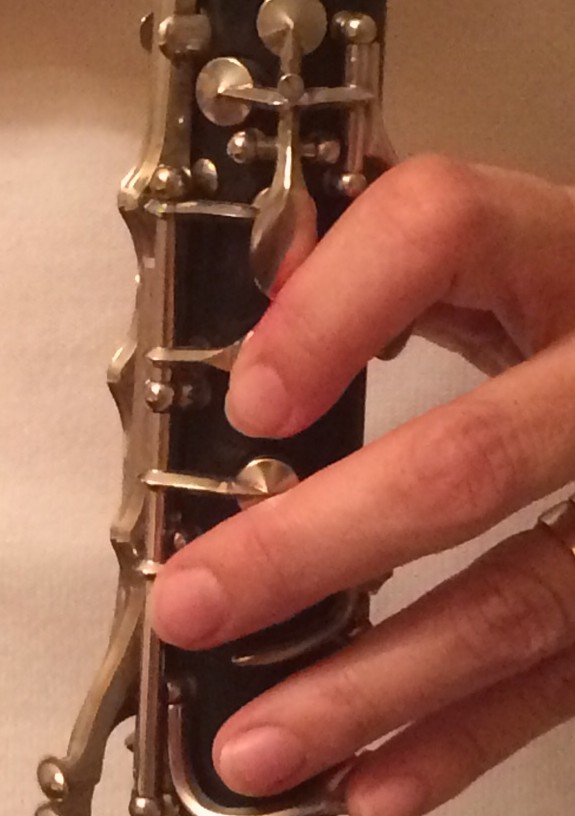
Here’s what it looks like if they are rolling, but not correctly:


Notice how you can completely see the 1st hole.
Now here’s how it will look right:
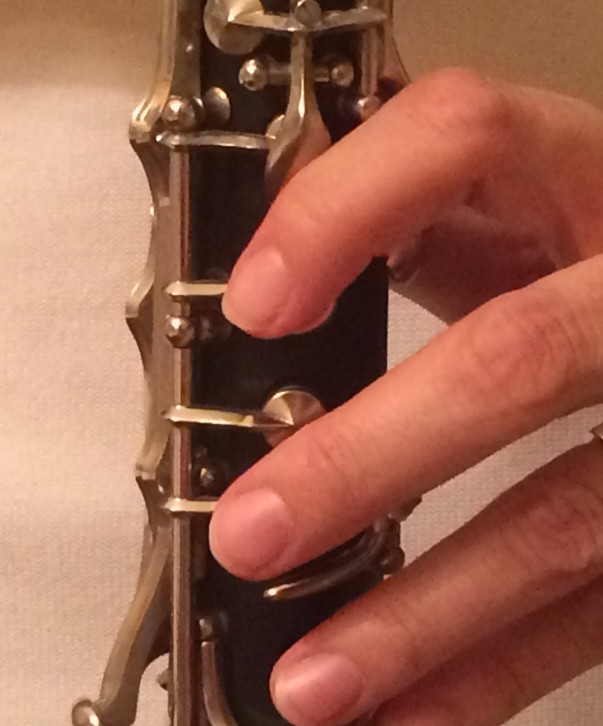
Notice you can’t see the open 1st hole at all. The two correct pictures look almost identical because there is so little motion between E and A.
Here’s some of the things you can say (many times) when teaching clarinets to roll to A.
- “Rotate from the 1st knuckle” (Technically it’s the metacarpophalangeal joint, but I wouldn’t teach beginning clarinets that!)
- “Press the A key with your knuckle, not your the side of your finger nail.” (This is the 3rd knuckle, the Proximal phalanges – don’t you feel smart now that you know that!)
- “It must be one motion.” and “There is no ‘up’ and then ‘down.’ The finger just moves down.” (This is only possible when they use their knuckle correctly.)
- “Do not hop.” Even if they are ‘rolling’ and using the side of the finger instead of the pad, they can easily still be hopping. You can’t just look at what the finger looks like on the key – you have to watch them actually move it.
- “The thumb still stays in contact with (or very near) the register key.” Because the first finger and thumb oppose each other it’s tempting to let the them float down below the tone hole and touch the wood. This is detrimental to technique. The thumb should never touch below the tone hole. Check this by walking behind them every day.
- “Be sure you are still pushing up/anchoring/wedging into your top teeth.” Whatever terms you use to be sure the mouthpiece is still in contact with top teeth. The reason this is important is that when the 1st finger is pushing down on the A key and no other fingers are down it is harder for the student to push up with their right thumb enough. I suggest having students move their right hand up to the barrel and hold at the barrel how remind them to push up. Then they can put it back in position and check. Another way to help with this are 2 of the things listed in the article 3 Clarinet Hacks which gives ideas for comfort in this area.
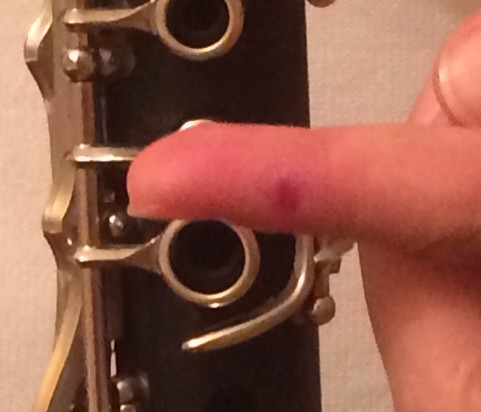
Here’s the trick I promised you. Get a marker or pen and put a dot on the student’s left index finger knuckle in the exact spot you want them to touch the key. Then point to the spot on the A key Where they can make contact. It’s easy to see on my instrument because I keep the tarnished spots to show students. You can also put a little tiny Avery dot on the key, but I find on the A key they fall off and aren’t worth the time. (I do use them for pinky dots – see this article.) Just be sure they know the contact spot will be a bit off center – closer to their left hand. Then have them touch the dot on their finger to that dot.

Here’s a sample of an easy exercise for beginners that I try to introduce before they get to A in the book. Going from G to A (as most books do) they are very likely to do it wrong. Slurring E to A, D to A or C to A they have a much better chance of understanding why precision is so crucial. This exercise could also be helpful to fix bad habits.

One final comment – if your advanced band kids are still struggling with this, have them play a B in the staff (all fingers down) and then ADD the A key. It should still sound 95% like a B. If they can’t do that they aren’t using the right spot on their knuckle. (One exception would be young students with extremely small hands.) They can practice keeping all the holes covered and hitting the A key with their knuckle until they can do it easily.
If you’ve been teaching clarinets to “roll to A” you’re on the right track. That’s one of many things you need to say to them. As always, try this with your students and come back here to let us know how it went.
CLARINET PODCAST & RESOURCE WEBSITE
A 1999 music education graduate of WTAMU, Tamarie Sayger held band director positions in Plano and Odessa, TX for 5 years. As a private clarinet instructor in Texas for 16 years, she has taught hundreds of students from grade 6-12 in classes, sectionals, and individual lessons. She has presented at district in-services and co-presented at the Texas Bandmasters Association convention. Her website, CrossingTheBreak.com, provides resources for clarinet teachers around the country. Mrs. Sayger is also a core contributor for BandDirectorsTalkShop.com, primarily on the subjects of clarinet and private lessons. Her podcast, Crossing The Break, can be found on iTunes.
Related Reading:
3 Clarinet Hacks – Better Clarinets in 30 Seconds
Why Are My Clarinets Playing Flat?
The Clarinet “Law of Minimal Motion”
If you would like to receive our weekly newsletter, sign up here.
Don’t forget to like us on Facebook too!
Learn. Share. Inspire.
BandDirectorsTalkShop.com
![]()
![]()
![]()
![]()


[…] Reading: Teaching Clarinets to Roll to A isn’t Enough Motivate Your Band – Reach […]