
Before the First Lesson
Make sure that you carefully review the first pages of the method book to help reinforce what you show the student about tone production, assembly, posture, basic maintenance, etc. as that will be their guide at home. Some method books now have videos showing step by step how to start and also when there is an instrument specific technique that needs demonstration. These videos are a great resource to use when students need a review or someone missed a class, especially those important first weeks.
Purchase at least two medium soft reeds before the first lesson. Although plastic or fiber cane reeds are commonly used for beginners, the best solution is to find quality hand-made reeds. They are usually better and often cost less. It is also a good idea to use reed makers in your area as reeds are sensitive to humidity and air pressure. A reed made in California is not as likely to work in a Minnesota winter climate. Handmade reeds typically run from $10.00 to $30.00, depending on the maker. Once you have found a reliable source for reeds, it’s a good idea to have a few extra reeds on hand for your students. If there is room in your budget, this will save some frustration and panic for your students. Handmade reeds take 5-10 hours to make, and sometimes reed makers ‘and music stores’ oboe reed stock runs out.
Make sure the instrument is in good playing condition by having a reputable repair person check it over and adjust it. Oboes are fussy. If one key is out of adjustment, generally the entire instrument will not work properly. Pressing harder doesn’t work for a key that is out of adjustment.
The First Lesson
Start by soaking the reed. A small container with a lid is nice (like you would use for salad dressing in your lunchbox), but not necessary. Fill your container with lukewarm water up to the thread and allow the reed to soak while showing how to assemble the instrument.
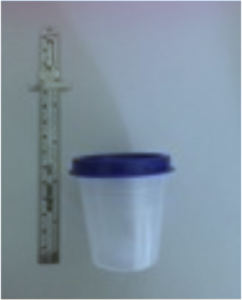
Container for soaking reeds 2 1/2 inches tall
Next, show them how to grease the corks. The tendency is to use too much cork grease. If you can see cork grease on the corks, wipe some of it off. Students may need to use cork grease every time they assemble their oboe until the corks compress a little. This is also true for the reed cork.
Have the student start with the oboe assembly. Put the bell on first. If you have a low Bb, be sure to hold down the larger pad when putting on the bell.

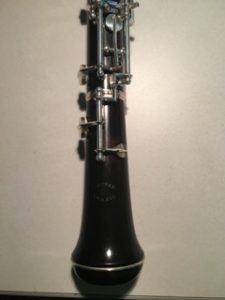
Resting the assembled bell and lower joint on your knee, make sure the corks on the right hand side tenon joint linkages are not missing.
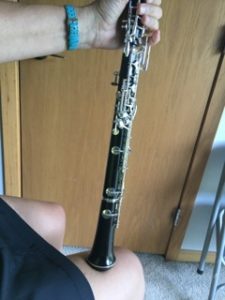
Push straight down on the upper joint after carefully aligning the upper link with the lower link. Do not twist them together.
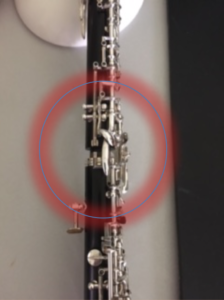
Have the student find where their fingers go on the instrument before putting on the reed. Many reeds get broken before they are ever played as there is no protection for them. Practice fingering the first few exercises in the lesson book, until the student feels comfortable with their hand position and can place their fingers properly without looking. This is a great way to review note names.
The Reed
A new reed might take 5 minutes to soak. You should always use a container of water to ensure that not only the two outside surfaces are soaked, but the inside of the reed is getting moistened as well. Additionally, water will not cause the reed to deteriorate as quickly as saliva, improving the life of that expensive double reed.
Check to make sure the reed works. It should crow a “B-C”.
This is done without an embouchure. Just put the reed in the mouth up to the thread and blow. A quick way to check a reed is to close the bottom end with your thumb and suck on the tip. Pull the reed gently out of the mouth, keeping the thumb over the bottom. The tip should close and then pop open with a little ‘pip’. Also check the sides for leaks. A playable reed does NOT have to have the sides lined up evenly. Sometimes slipping them to offset the sides will seal a reed, but this should be done by the person making the reed. After it is wrapped and scraped, aside from fooling around with ‘Fishskin’ or Goldbeaters skin, there isn’t much to be done for a leaky reed other than to replace it.
Holding the reed lightly on the cork with the thumb and first to fingers, have the student find their ‘sweet spot’ by experimenting with reed placement without the oboe. Start with the wet/dry line on their bottom lip and have them roll their lips in with the reed and then blow. It takes a LOT of air to get two reeds to vibrate. They should be producing a single tone that sounds close to a B natural, rather than the raucous crow described in the paragraph above. See how long they can play just the reed with a steady tone. Have the student roll the reed in and out, drop their jaw and then tighten it to find the place where the reed vibrates freely.
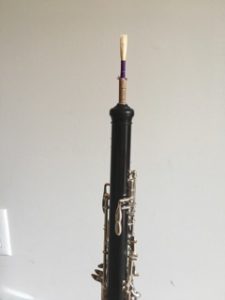
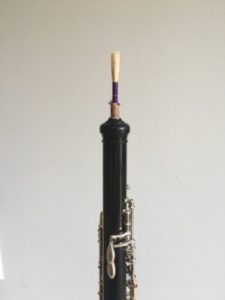
Now it’s time to unite reed to instrument. After applying a little cork grease to the cork portion of the reed, have the student lightly insert the reed into the receiver of the oboe, then check reed alignment before they push it all the way down. There are many intonation problems caused by not inserting the reed all the way in. When they feel it’s ‘straight’, have them push it in. The reed is delicate and difficult to rotate if it put in crooked.
The Embouchure
Start with third line B natural, and see if they can make a sound. Have them add fingers to check hand position. If they can slur all the way down to low D (B, A, G, F#, E, D), you may have a rockstar on your hands!
The embouchure should be round rather than flat, more like a drawstring than a clamp. It is essentially an inverted brass embouchure. The back molars should not touch.
For GREAT pictures of Oboe embouchure
dos/don’ts read this article
(Demystifying Double Reeds) next.
Make sure they breathe out as well as breathe in while playing to release old air. There is a lot of back pressure because of the narrow bore. It is a good idea to mark places to exhale as well as breath marks in their music. Start with the beginning note in their lesson book. The first few exercises usually include whole note practice followed by a whole rest. Instruct students to “Breathe Out” on beats 1 and 2 of the whole rest and then “Breathe In” on beats 3 and 4 in preparation for the next note to get them used to releasing built up air.
Taking Breaks
Play for only 10 minutes at a time to avoid developing the ‘crocodile bite’. Students tend to bite down on the reed as they become fatigued. It takes time to build endurance for the muscles around the mouth. The right hand, in particular, is easily fatigued because of the distance between the thumb and the pinky. The added the weight of the instrument to an extended hand and forearm position can be difficult to maintain, especially in young students. Frequent breaks for embouchure and right hand are needed to avoid bad habits or potential injury.
A quick test for embouchure is to play low D or C, after completing a lesson exercise. If the student can’t get a sound or plays the upper octave, their embouchure is too tight. Take a break, take less reed. Another test is the tone quality on third space C. If it is sharp and very bright in tone, most likely the student has too much reed in their mouth or they are biting down. Take a break, take less reed and try to round out the embouchure.
Finishing Up
Be sure to stop with enough time to show your student how to swab the oboe. NOTE: While a cloth swab will go all the way through the bottom tenon joint and bell, most oboe swabs will not pull all the way through the upper tenon joint. Instruct students to carefully feed the weight in through the larger end and pull it until the swab starts to feel snug. Then simply reverse the direction and pull it back out.
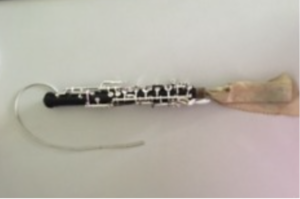
Swab in upper tenon joint does NOT go all the way through.
Check to make sure the upper and lower tenon joints are in the right slots in the case. Point out the big spot for the thumb rest for the lower joint. Put the pieces in the case incorrectly and gently close the lid. Most cases will not close if something is in the wrong spot.
Terri Svec has taught beginning and middle school band for 32 years. She has degrees in Music Education from East Carolina University and the University of Illinois, U-C Campus. She continues to perform in the Twin Cities in concert bands, symphony orchestras and chamber music and would be happy to answer your oboe questions, including questions about handmade reeds. She can be reached at tsvec@bhmschools.org.
Related Reading:
Demystifying Double Reeds
1 Bassoon Tip to Save Your Band Hundreds of Dollars
Flute Embouchure – Simple Steps to Great Success
How I Teach Clarinet Embouchure
If you would like to receive our weekly newsletter, sign up here.
Don’t forget to like us on Facebook too!
Learn. Share. Inspire.
BandDirectorsTalkShop.com



Leave a Reply
You must be logged in to post a comment.