This is the 2nd part of a post about brass tension – read part 1 here.
Diagnosing the Real Cause
First, you must figure out where the tension is truly coming from. When working with students, I have found there are three main sources of most tense sounds:
- Face/Head
- Body
- Air
Since this article is addressing the brass section in general, I will cover the areas of commonality. In future posts, I will address instrument specific issues.

Face/Head:
The face and head areas are the first place to look for tension. Many students do small things that can have a very negative impact on their playing. It is important to look at these often and always ask yourself if each individual student is making their best possible sound. If they don’t make a professional quality sound, then the answer is not yet. Here are the places to check:
- Jaw – the jaw (mandible) should be relaxed, released and the top and bottom teeth should be aligned in the front. Many students like to pull the jaw back. It is also important for the students to understand the function of the jaw. I remind them that the mandible is capable of moving like an elevator. We sometimes speak in relation to the number of floors apart that the teeth should be.
- Lips/Aperture – the air opening should meet between the opening in the teeth. For many students, this means they will have to reach their top lip down a little bit. Often, a student will look good, but the aperture will be against the top teeth. (You will ask if their teeth are open…and they are, the aperture just isn’t lined up.)
- Embouchure – the corners of the mouth should generally move toward the mouthpiece. Some students pull their corners back in to a “smile” or back and down into a “tight frown”. Pulling the corners away from the center will make the vibration apparatus too thin to make a great sound.
- Cheeks and eyebrows – these areas should look very natural while a student is playing. If they have to move either of these while they play, there is tension in their face. They must look in a mirror to play and make sure their face looks like when they are resting or bored.
- Chin – check to make sure their head is “released” to its natural position. Many students will slightly (or not so slightly) tuck their chin in to their neck. We call this “triple-chinning” in my band room. This causes airway obstruction, facial tension and improper instrument angle. I ask the students to “release” their head as a signal to put it in its most neutral position. This may require some help from you to find the natural placement of their head.
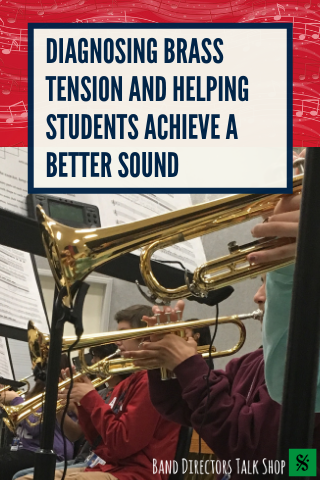
- Instrument angle to face – In my experience, all of the brass instruments have a natural, slight downward angle from the face. Only in rare cases of a student with an extreme under-bite have I had to make exceptions. I encourage my brass players to think of the bottom jaw as their anchor. The weight of the instrument rests very lightly on the bottom jaw and then only makes enough contact with the top jaw and sides to form an air seal. Instrument specifics about how much angle will come at a later time. For now, just make sure the students is not pushing in to the top lip or angling the mouthpiece up from the face.
Body:
Body tension, luckily, is easier to see than the other forms of tension. There are four main things to look for:
- Posture – The student must sit tall with their feet flat on the floor. The shoulders should align with the hipbones and the knees should align with the heels. This will create physical balance that will allow the student to keep an open relaxed torso.
- Shoulders – The shoulders should be down. Many students make the mistake of pulling their shoulders tightly back when asked to sit up tall. I ask my students to pull their shoulder blades in and down. This helps them to open their shoulders and chest without creating extra tension. You also find many bring their shoulders up when they breathe. As the music gets more exciting, their shoulders may come up and stay up (unless addressed by the teacher).
- Hands – I encourage my students to hold the instrument with the fewest muscles possible. Look at all of the places that the instrument touches and see if there is a way to make it balance, rather than “gripping” it. The hands should make a relaxed C-shape (except for trombone which should still be lightly gripped with as few muscles as possible).
- Neck – Check to make sure the neck is long and aligned. This will affect tension in the face as well as the airway. Also, check to make sure the head is balanced above the neck. It should not be oddly forward or back of the neck. A great phrase I learned to use is “Swan Neck”. This reference gives my students a great visual and helps them to get their neck in the right position. It also serves as a fast reminder while we are in action.
Air:
How air is entering and leaving the body is the most difficult area to diagnose when tension is involved. This is because it is very hard to see.
- Pause before release – This is the easiest to diagnose. When students breathe in, there should be no stop in the motion of the air. I have heard many clinicians refer to a circle or a golf swing when talking about how the air should move. If the student holds the air just prior to the release, there will be tension in the body and usually there will also be a small explosion at the start.
- Holding air back – This is difficult to see. Many students will hold air back rather than letting it out at the speed it naturally wants to go. A properly set aperture will not allow too much air to escape. If they are afraid they will run out of air early, they need to take in more air and let the air move naturally.
- Restriction – This is the most difficult tension to diagnose. It can be anything that gets in the way of the air column itself. It could be the teeth as previously mentioned, but it can also be the tongue. The tongue can cause obstruction in the front near the teeth, the middle (like saying “ah” instead of “oo”), or in the back (like when you say “gah”). Brass players want to use an “oo” or “O” (low brass) vowel for much of their playing.
The best way to address air tension issues is to have your students do breathing exercises without the instrument. This allows you to hear how the air is moving. Their tongue should be down in the bottom of the mouth just behind the bottom teeth. Having the students practice breathing with the vowel “O” will allow them to feel the correct tongue position as well as the unobstructed throat all of our band directors really wanted their students to have. The sound of this breathing will be quiet and low in pitch. Any students who are making a high sound have some kind of obstruction that needs to be addressed. Once they understand this feeling, the breathing exercise can be moved to the instruments (air only) to help them feel how the air should move when they play.
A Thought on the Issue of Braces:
I have worked with many students who have dealt with braces over my years of teaching. Though it is challenging to help those students develop a completely characteristic sound, it is very often possible. For most of my students, it has involved reaching their lips far around their braces. This allows them to have a normal amount of lip muscle between the braces to create an aperture. I use the phrase, “Get more meat in the middle.” If the students will work to get the lips past the braces rather than on top of them, there will be more surface to create a natural vibration. I have also found that students who are able to achieve a near-characteristic sound with braces have a very easy time adjusting once the braces are removed.
This is the 2nd part of a post about brass tension – Read Part 1 “Avoiding the Most Common Pitfall – Brass Tension” here.
Annette Mitchell is currently in her 17th year of teaching middle school band. She was blessed to study at WTAMU and South Methodist University. She credits much of her brass methods thoughts, beliefs and techniques to her teacher Lynne Jackson and mentor Pete Tolhuizen. When she is not in a band room, Mrs. Mitchell is enjoying time with her husband and two year old son.
Related Reading:
French Horn – Projected sound
How to Have a SILENT Band Rehearsal
Band “Drop Out” Contest
If you would like to receive our weekly newsletter, sign up here.
Don’t forget to like us on Facebook too!
Learn. Share. Inspire.
BandDirectorsTalkShop.com


Leave a Reply
You must be logged in to post a comment.