Does your flute section struggle with balancing their instruments? Does the tone quality of some high register notes sound muffled or very out of tune? Do you lose precious rehearsal time waiting for students to look up fingerings for trills and high notes? Each of these issues can be tackled with simple corrections and exercises that will result in improved flute tone, intonation, and technique.

Start by making sure each of your flute students understands and models proper body and hand positions. The ideal body position for a flutist is when the shoulders and hips face 45° to the right of the music stand and/or audience, the head turns to face the stand, and the flute aligns parallel (photo 1). The flute should balance evenly between the chin/lower lip, base of the left hand first finger, and right hand thumb (photo 2).
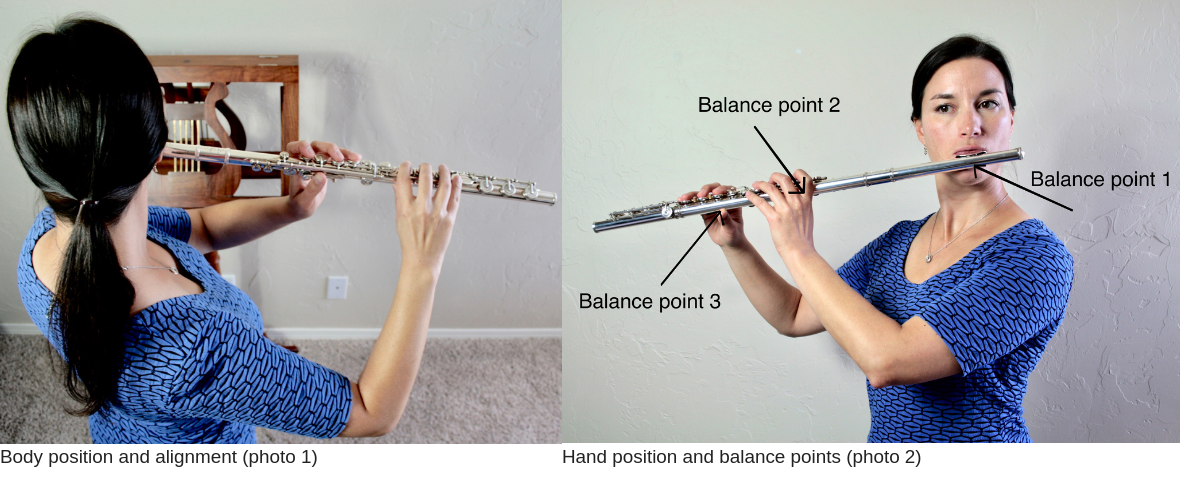 Hand and finger positions should be as close to a resting position as possible without added tension. Each finger, with the exception of the thumbs, should curve naturally. The fingers should move easily from the knuckles, with no collapsing of the finger joints. The fingers cover the keys best when the pads make contact with them, instead of the tips of the fingers. When not actively used, the fingers should stay within an inch of the keywork and avoid pressing other keys unintentionally. Students often will hold the instrument while also touching the rods or keywork if they have not achieved a feeling of balance between the three points of contact. Good flute finger technique comes from excellent balance, coupled with close fingers and a light touch.
After making any necessary position changes, begin to notice your students’ fingering for D2 and E♭2 (octave labels are specific to the flute range, i.e. middle C is C1). Keeping the left hand first finger down for these two notes is very common, but is audibly inferior as it sounds muffled. Many flute fingerings are the same between the first and second octaves, but it is important to know the exceptions. Explain to your students that the first finger left hand acts as an “octave key” for D1 to D2 and E♭1 to E♭2. Practicing slurred octave exercises between the first, second, and third octaves can be very helpful (example 1).
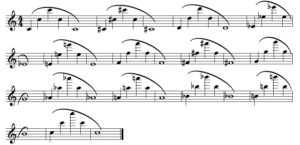
Octave slurs exercise (example 1)
If you are working with beginners, add the third octave when they are more advanced. A firm grasp of the subtle fingering differences between octaves will help solidify them when they come up in ensemble repertoire. Each of your students should be equipped with fingering charts they can refer to often as they master the instrument. It is much easier to learn correct fingerings from the start instead of having to fix them later!
The use of the D# key (R4: right hand pinky) is also very important. Many times, pressing or lifting the D# key will make no difference in the sound of a note. For example, when facilitating a descending slur from G1 to C1, lifting R4 on G1 makes it easier to connect the notes and doesn’t impact the sound. However, playing G1 all the time without R4 will make it difficult to balance the instrument. Encourage your students to use the D# key as the standard fingering for all notes played chromatically from D#1 to C#2 and D#2 to B4 (example 2). This will help them balance the instrument better, and facilitate smooth and even note connections when playing technical passages.

All notes within brackets should use the Standard D# key down fingering (example 2)
Playing B♭1 and B♭2 has its own challenges and options. If your students understand the advantages of each, they will perform in many contexts more successfully. The standard fingering of “long B♭” can be used in a variety of situations, especially when there is a B♮ or F#3 nearby in the same passage, making other B♭ fingerings less desirable (example 3).
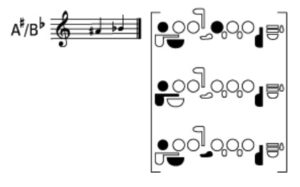
Long B♭, B♭ Thumb, and B♭ Lever fingerings
The B♭ thumb key fingering is great for passages that contain a lot of B♭s, as it simplifies the finger movements by making R1 unnecessary. However, it is important to note that using the B♭ thumb key turns all Bs into B♭s, and it cannot be used when playing F#3. The lever B♭ fingering is suited well to chromatic passages and trills between B♭ and B♮.
Remembering trill fingerings can also be tricky for young players. Trill charts are vital, and those that are compact and sturdy are best so your students can store them in their folders for reference when needed.
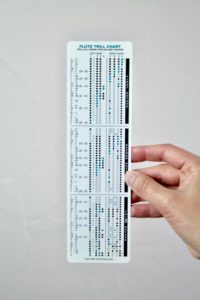
Compact trill and fingering chart
Check which fingers students use for each trill key. I recommend using R1 for trill key 1 and R3 for trill key 2 (photo 4 and 5).

These fingers structurally feel closest to their respective keys. Additional commonly misfingered notes to be aware of:
- F# 3 (use R2, instead of the standard R3, when immediately before B4 to make the interval smoother)
- B♭3 (no L1)
- G# 3 (no L1)
- C# 4/D♭4 (no left pinky when used in scales and fast passages)
- C 4 (leave off high C facilitator for scales and fast passages)
Besides slurred exercises between octaves, repetitive major and minor scale patterns can be very helpful in reinforcing accurate fingerings in every range (example 4).

Major and minor scale pattern exercise excerpt (example 4)
There are also several alternate fingerings you can add to your rehearsal toolkit that will aid in pitch correction:
- C#2 (add R2 and R3) – flatter
- E3 (lift R4) – flatter and less likely to crack
- G#3 (add R2 and R3) – flatter
- F#3 (with R2 instead of the standard R3) – flatter and less likely to crack
One of my favorite online resources for flute and piccolo fingerings can be found at https://www.wfg.woodwind.org/flute. Staying vigilant with your section on balanced body and hand positions, available printed and online resources, and possible fingering options have the capacity to significantly elevate their playing together and as individuals. Over time, becoming aware of and correcting common flute fingering pitfalls your students encounter will make a positive impact on their tone and finger technique.
Erin Kendall Murphy is the Assistant Professor of Flute at Oklahoma State University and performs with the Analogue Duo and Lakeshore Rush ensemble. She holds performance degrees from the University of Michigan (BM), Northwestern University (MM), and the University of Wisconsin-Madison (DMA). Visit Erin’s website for more information.
Related Reading:
Troubleshooting Flute Tone
Flute Embouchure: Simple Steps for Great Success
4 Flute Hacks to Develop Good Habits
If you would like to receive our weekly newsletter, sign up here.
Don’t forget to like us on Facebook too!
Learn. Share. Inspire.
BandDirectorsTalkShop.com




Leave a Reply
You must be logged in to post a comment.