Merriam-Webster defines fluent as capable of moving with ease and grace, effortlessly smooth and flowing, and having or showing mastery of a subject or skill. Musicians require fluency to perform with ease, and mastery of fundamentals builds fluency. Fluency leads to freedom.
Consider this:
- What should a flute player know how to do, when should they know it, and why does it matter?
- What can we do to lead them there?
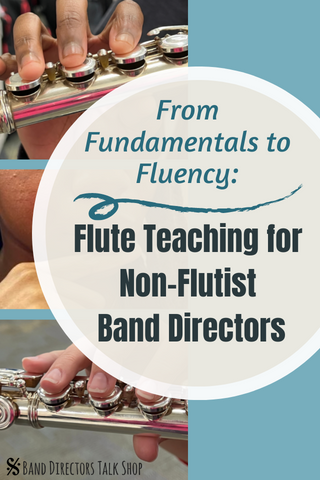
If you are not a flute player, flute is likely one of the more challenging instruments to teach. Brass instruments are similar, and reed instruments are similar, but flute is just a little bit strange. This article is intended to provide an outline of a suggested flute pedagogy sequence to help build fluency through starting flutists, developing flutists, maintaining flutists, and advancing flutists.
Starting Flutists: First Sounds
 Starting with headjoint sounds is an appropriate approach to teaching correct embouchure and tone. Try demonstrating the “finger flute” under your bottom lip for students to mimic: doing this with your right hand, first finger, establishes the direction the flute points (right) while confirming the correct placement of the lip plate on the correct spot on the chin.
Blow out the candle (don’t spit on the cake) with a “pu” shaped aperture (try saying  “pu” and keep your lips that shape); flute requires a natural, flat face with lips relaxed (not smiling).
It can be challenging to lead flute players to articulate (many start by breathing between each note rather than using the tongue to separate the air). The tongue should touch behind the top teeth on the roof of the mouth at the spot where the top teeth touch the roof of the mouth. Try asking your students to say “pretty” or “pu-tee” (like the “pu” shape followed by “tee” to force the tongue to articulate.
Starting Flutists: Instrument Assembly and Holding the Flute
Assemble the flute from the bottom up – footjoint to body, then headjoint to body. Think Space Station docking: we want to push the parts straight together then twist, rather than angling pieces into one another, which is what leads to bent ends of the headjoint or body.
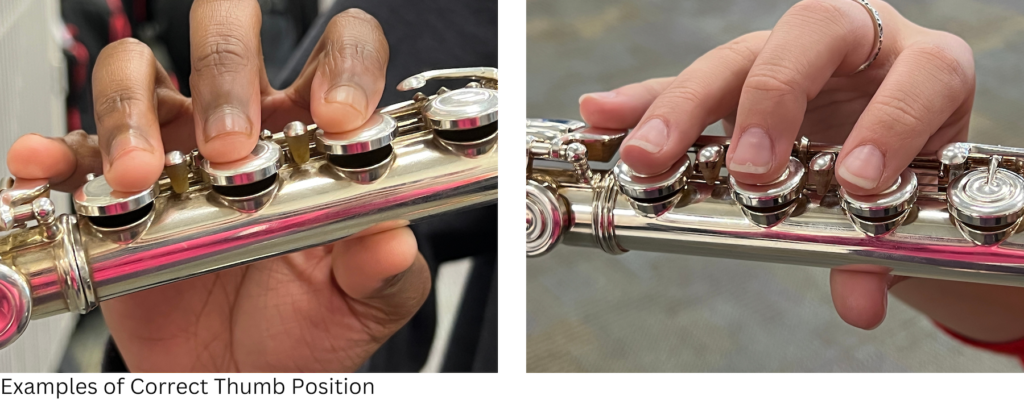
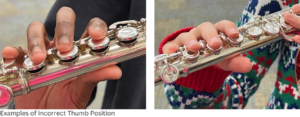
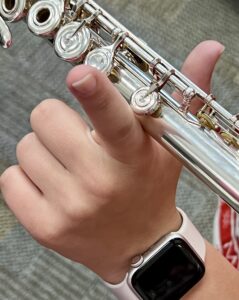 Left-Hand should be in the shape of an L with the knuckle bump resting against the flute. The Right-Hand thumb is arguably the most important finger on the flute: this should be resting on its side underneath the key pressed down for F.
It can be tricky to share stands as a flute player because of the flute angle, try to give flutists their own stands or at least allow them to angle their chairs to make it easier to sit correctly.
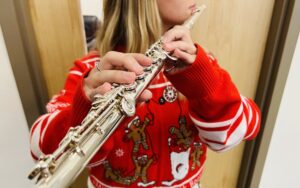
Where is the flute held? This comes as a surprise to many: the flute is held in front of your body:
“Flute Yoga” Exercise: “Marching Band” attention, push forward with the right hand (headjoint will fall onto the left shoulder if done correctly), lift the flute up (headjoint will be next to ear if done correctly), and then turn the head left. Try this, and then check out your or your student’s arms: they will be in front of the chest if the exercise is completed correctly. This also means that for a flute player to “face forward,” their lower body will be facing a different direction than their upper body.
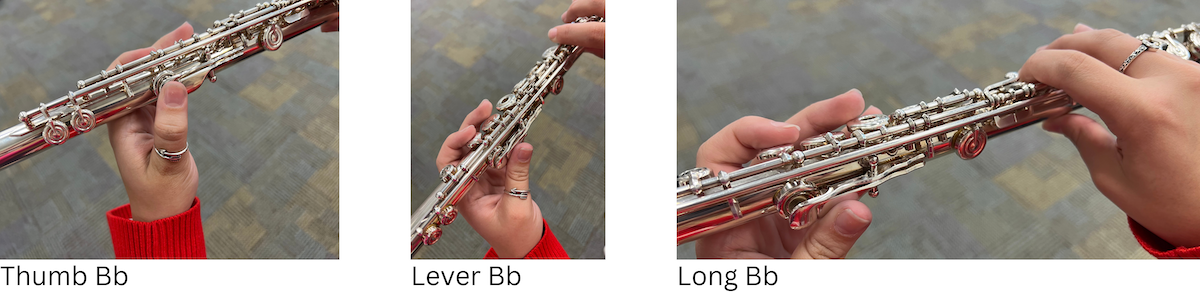
Starting Flutists: The Three B flats
There are three options for Bb on the flute. I recommend teaching Thumb Bb to start and Lever Bb for chromatic passages. “Long” or “Beginning Band” Bb (usually what is in the beginning band book) makes for a clunky transition to C.
Developing Flutists: Tone, Articulation, Pitch/Intonation, and Vibrato
What is characteristic tone? What should a flute player sound like? Check out the listening examples below for my personal favorite flutist’s sound.
Cantabile et Presto by Georges Enesco, performed by Laurel Zucker
The Fog is Lifting by Carl Nielsen, performed by Laurel Zucker
Where does the tongue hit inside the mouth? This was covered earlier in starting flutists: continue to keep an eye on this and on their throats to ensure that there is no “throat” articulation occurring.
Pitch and intonation are adjusted by moving the head up and down: please don’t tell your flutists to roll in and out! The rationale for this is that hand position shouldn’t change: adjusting the height of the chin helps fix pitch concerns (flat? try lifting the chin up – sharp? try angling the chin down towards the chest) and keeps hands where they should be.
According to Michel Debost, vibrato is a “modulation in pitch.”
Vibrato is two things: pulses of air and variations in pitch. Vibrato can be taught/demonstrated through “pulsing” exercises (pulsed air that changes pitch). Try having flutists play a Bb (just above the staff) without their tongue in 4 quarter notes, 8 eighth notes, 12 eighth note triplets, and 16 sixteenth notes.
Maintaining Flutists: Warm-Up Techniques/Hand Position and Body Position Review
Harmonics are a great way to push your flutists to play with big, full air and help expand their range. During individual and group warm-ups, harmonics can be used to practice air speed, air direction, pitch, and pulsed air (vibrato).
During group warm-ups, flutists can also work on pulsing air through long tones in specific patterns or rhythms. Though they will never be required to play with “eighth note” pulsed air necessarily, developing the skill of varying vibrato speed will deepen their vocabulary with the concept.
Double and triple tonguing exercises are excellent for working on articulation and building the skill of using both parts of the tongue to articulate. Check out the book “243 Double and Triple Tonguing Exercises” by Victor V. Salva for a great breakdown of how to teach and how to practice this. I recommend using the syllables “doo” and “goo” rather than “ta” and “ka” due to the natural shape of the mouth and embouchure when playing; “doo” and “goo” are more like a desired flute face than the latter.
Our most important finger on the flute is the right thumb; the position of it under the flute or along the flute determines how far rolled in or out the flute is. Angling the right thumb can also cause another undesired outcome of a straight right pinky, which can become painful over time and cause strain along the side of the right hand.
Marching band flute vs. concert band flute: body position is different due to the alignment of the upper and lower body. Keep this in mind with our “flute yoga” exercise, which helps correct this alignment (while seated) earlier! It’s OK that it’s different, and it’s important to acknowledge and demonstrate the difference.
Advancing Flutists: Extended Techniques and Flute Upgrades
Flutter-Tonguing and Beat-Boxing are cool tricks and techniques to help students grow outside the box.
Check out the listening example below for a performance that includes extended techniques like beatboxing, harmonics, and singing and playing.
Zoom Tube by Ian Clarke, performed by Ian Clarke
Harmonics fingerings can come in handy as “alternate” fingerings in rare cases where normal fingering patterns are extraordinarily difficult.
Find ways to practice double and triple tonguing during full group warm-ups and incorporate singing and playing where possible. Check out Extended Techniques for Tone Development by Robert Dick for a great singing and playing exercise; he has videos online explaining and demonstrating this concept as well.
Starting on D above the staff, fingerings are different. Reference a fingering chart for trills! Using the correct fingering is important for tone and pitch purposes.
C Foot vs. B Foot: advanced high school players should have a B foot as it allows them to play another scale in three octaves, and a Gizmo Key is usually included on a B foot which makes it easier to play a high C.
C# Trill keys are becoming more common on student flutes and are not necessary but can facilitate a rare trill (B-C#); the High E Facilitator/Donut Mechanism is helpful in making it easier to play a high E with a better tone.
Headjoint Material: in general, the better the metal, the better the tone and resonance! My personal preference is silver (as much as possible!), but experimenting with different metals (especially the headjoint material) can make a noticeable difference in tone, pitch, and resonance.
Flute Fluency
Teaching an unfamiliar instrument does not need to be intimidating! Find opportunities to connect with peers who play instruments unfamiliar to you and build your own fluency. I hope this information and flute pedagogy sequence will assist in building your fluency with the flute.
Charlene Cannon is in her 13th year as a music educator and her second year as band director at Horizon High School. Prior to Horizon, she taught band at Freedom High School and Bridgewater Middle School. Ms. Cannon holds a MA degree in Music Education from the University of South Florida and a Bachelor of Music Education degree from Florida State University. Ms. Cannon is active as a guest conductor and has presented sessions at conferences for the Florida Music Education Association, Florida Flute Association, and National Flute Association.
Email: charlene.cannon@ocps.net Phone: 407-388-4185
Related Reading for Flute Fluency:
Flute Basics: Fixing Fingering Problems
Mastering the Art of Flute Articulation
Learning to Play the Flute in Tune (Part 1)
If you would like to receive our weekly newsletter, sign up here.
Don’t forget to like us on Facebook too!
Learn. Share. Inspire.
BandDirectorsTalkShop.com


Leave a Reply
You must be logged in to post a comment.